A cost center in ERPNext answers the question "which part of the business did this income or expense belong to?" Used well, cost centers give you a profit and loss statement per branch, department or business line without adding a single account to your chart. Used badly, they produce reports nobody trusts.
Plan the tree before you post
Cost centers live in their own tree, the Chart of Cost Centers, separate from the chart of accounts. Like accounts, each is either a group or a ledger, set with Is Group.
ERPNext only lets you post to ledger cost centers. Try to use a group and you get an error saying group cost centers cannot be used in transactions. So the leaves of the tree must be the units you actually want to report on, such as Nairobi Branch or Mombasa Branch, with groups above them for roll-ups such as Coast Region.
Good rules of thumb:
- Pick one dimension for cost centers, usually location or department. Do not mix both in one tree.
- Keep it shallow. Two or three levels are enough for most companies.
- Use Cost Center Number if you want a stable code in reports.
- Use Disabled rather than deleting a cost center that has history.
If you need a second dimension, such as department across all branches, use an accounting dimension rather than forcing it into the cost center tree.
Defaults decide most postings
Most people never pick a cost center on a transaction. ERPNext fills it from defaults, so set these with care:
- The Company's Default Cost Center and Round Off Cost Center.
- Item and Item Group defaults for buying and selling cost centers.
- POS Profile and other defaults where they apply.
Then check that users can see the field when they need to change it. On a new ERPNext v16 site, the Accounting Dimensions sections on invoices, where Cost Center and Project sit, stay hidden until Enable Accounting Dimensions is ticked in Accounts Settings. If your team should choose cost centers on invoices, switch it on.
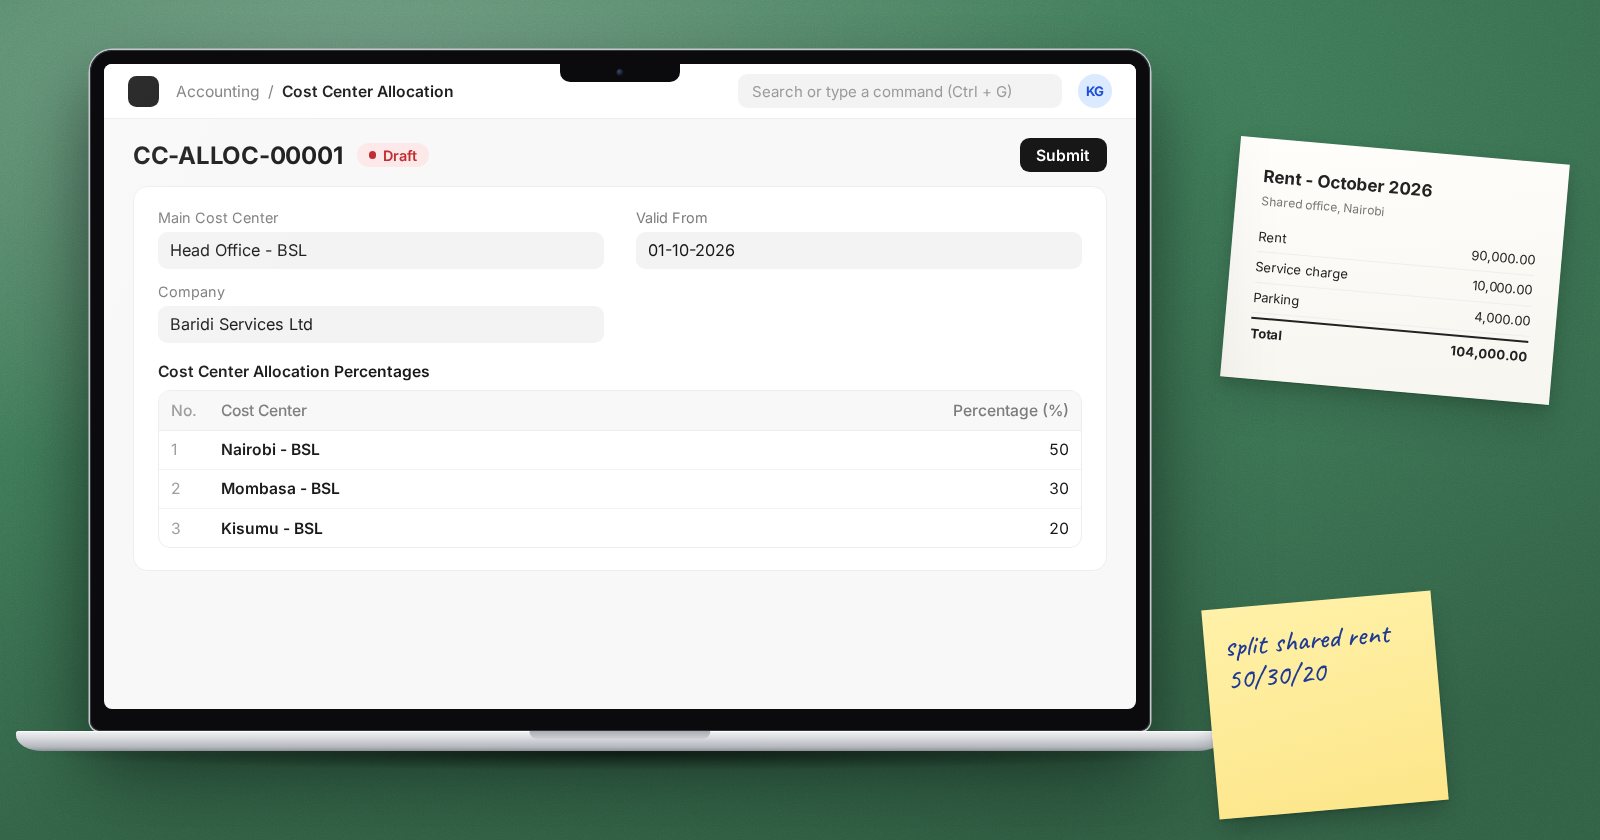
Shared costs with Cost Center Allocation
Rent, insurance and head-office salaries often belong to several branches. Instead of splitting each bill by hand, use Cost Center Allocation.
- Choose a Main Cost Center, for example Head Office Shared.
- Set Valid From.
- In Cost Center Allocation Percentages, list the target cost centers and their percentages. The total must be 100, and the main cost center cannot appear in the table.
- Submit.
From the Valid From date, any GL entry posted to the main cost center is distributed across the targets in those percentages when the transaction is posted. Staff keep booking shared costs to one cost center; the ledger shows them split. ERPNext will not accept a Valid From date earlier than the last GL entry already posted to the main cost center. To change the percentages, create a new allocation with a later Valid From date; the old one then applies only up to that date.
Reporting by cost center
- Profit and Loss Statement and Balance Sheet have a Cost Center filter.
- Trial Balance and General Ledger can be filtered by cost center.
- Budget Variance Report compares actual spending to budgets set per cost center.
Before trusting these reports, run the General Ledger for income and expense accounts with an empty cost center filter and look at which cost centers are used. A large balance on the company's default cost center often means people never chose one.
Common mistakes
- Accounts per branch, such as Rent Nairobi and Rent Mombasa. Use one Rent account and cost centers.
- A default cost center that is a real branch, so unassigned costs silently land there. Many teams use a dedicated Unallocated cost center and review it monthly.
- Changing a Cost Center Allocation by amending old periods instead of creating a new one from a later date.
Try it
Create a group with two branch cost centers and a shared one. Add an allocation of 60 and 40 percent, then book a rent bill to the shared cost center and run the Profit and Loss Statement for each branch.
Management reporting with cost centers is covered in the Accounting Professional course.