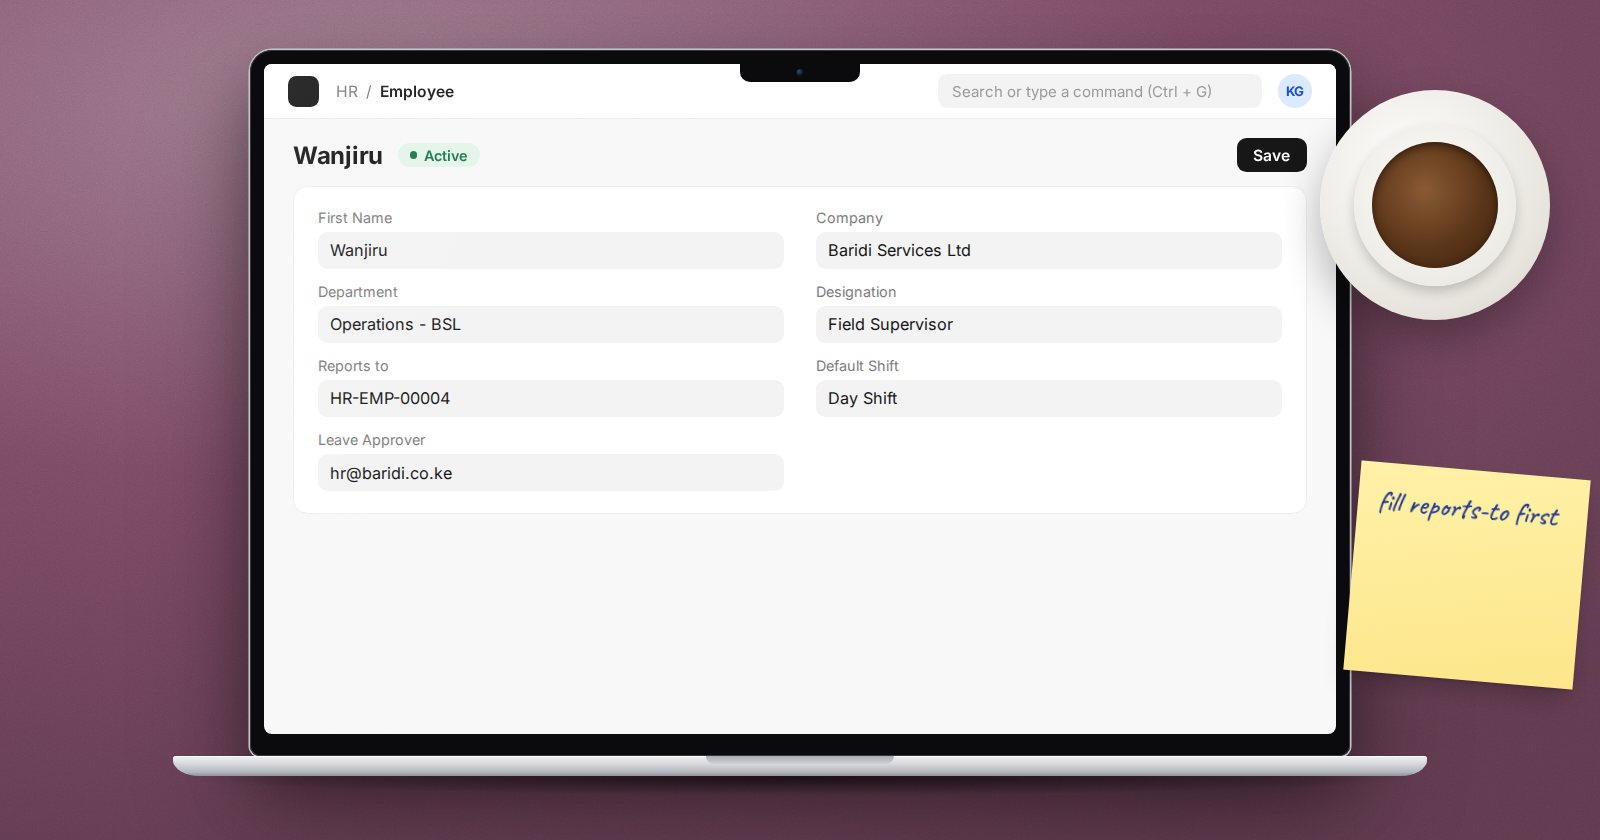
The Employee record looks like a simple contact card, but almost everything in HR and payroll reads from it. Leave applications look up the approver on it. Payroll looks up the company, cost center and bank details. Attendance looks up the shift and the biometric ID. If the record is thin or wrong, every process downstream inherits the problem.
This guide covers what to fill in, in what order, and why each field matters.
Decide how employees are named first
Before you create the first employee, open HR Settings and check Employee Naming By. The options are Naming Series, Employee Number and Full Name. Most companies are best served by a naming series or their existing staff number, because names change and two people can share one. Changing the naming approach after a few hundred records exist is painful, so settle it on day one.
The fields that drive other modules
On the Overview tab, fill in First Name, Gender, Date of Birth, Date of Joining and Status. Date of Joining matters more than it looks: leave allocations, attendance and salary slips all refuse dates before it.
In the Company Details section of the same tab, set the Company and then:
- Department and Designation - used to filter payroll runs, appraisal cycles and reports.
- Reports to - builds the organisation chart and is useful for approval rules.
- Branch and Grade - optional, but payroll entries and leave tools can filter by both.
- Employment Type - also a filter in the Leave Control Panel and shift tools. On the Attendance & Leaves tab, set the Default Shift, used for attendance when no shift assignment covers a day. Then set the Leave Approver, Expense Approver and Shift Request Approver. These are user accounts, not employees, so the approver must have a user login. Also fill Attendance Device ID (Biometric/RF tag ID) if you use a clocking device; check-ins are matched to employees through this field.
On the Salary tab, set the Salary Mode (Bank, Cash or Cheque), bank name and account number, plus the Payroll Cost Center if salaries for this person should post to a specific cost center.
Link a user account
If the employee will apply for leave or submit expense claims themselves, link a User ID. The Create User Permission option is ticked by default, which restricts that user to their own employee record in HR documents. Leave it on unless you have a reason to remove it.
Holiday lists in version 16
Older guides tell you to set a Holiday List on the employee. In current version-16 HRMS, holiday lists are applied through a separate Holiday List Assignment document, made either for the employee or for the whole company. If you see errors saying no holiday list was found for an employee, that is where to look.
When someone leaves
Do not delete employees. Set Status to Left and fill the Relieving Date on the Exit tab. ERPNext will not let you save Left without a relieving date. Keeping the record preserves salary history, leave ledgers and audit trails.
Common mistakes
- Creating employees before the company, departments and designations exist, then fixing them one by one.
- Leaving approvers blank and wondering why leave applications go nowhere.
- Typing the biometric ID with extra spaces or leading zeros that the device does not send.
- Using personal email as the only contact and losing access when the person leaves.
Try it
Create one test employee and walk the record through the system:
- Fill every field listed above.
- Assign a holiday list and a leave policy.
- Log in as that user and apply for one day of leave.
- Check the approver receives it.
If any step fails, the cause is almost always a missing field on the Employee record. The HR Essentials course walks through employee setup, attendance and leave end to end.