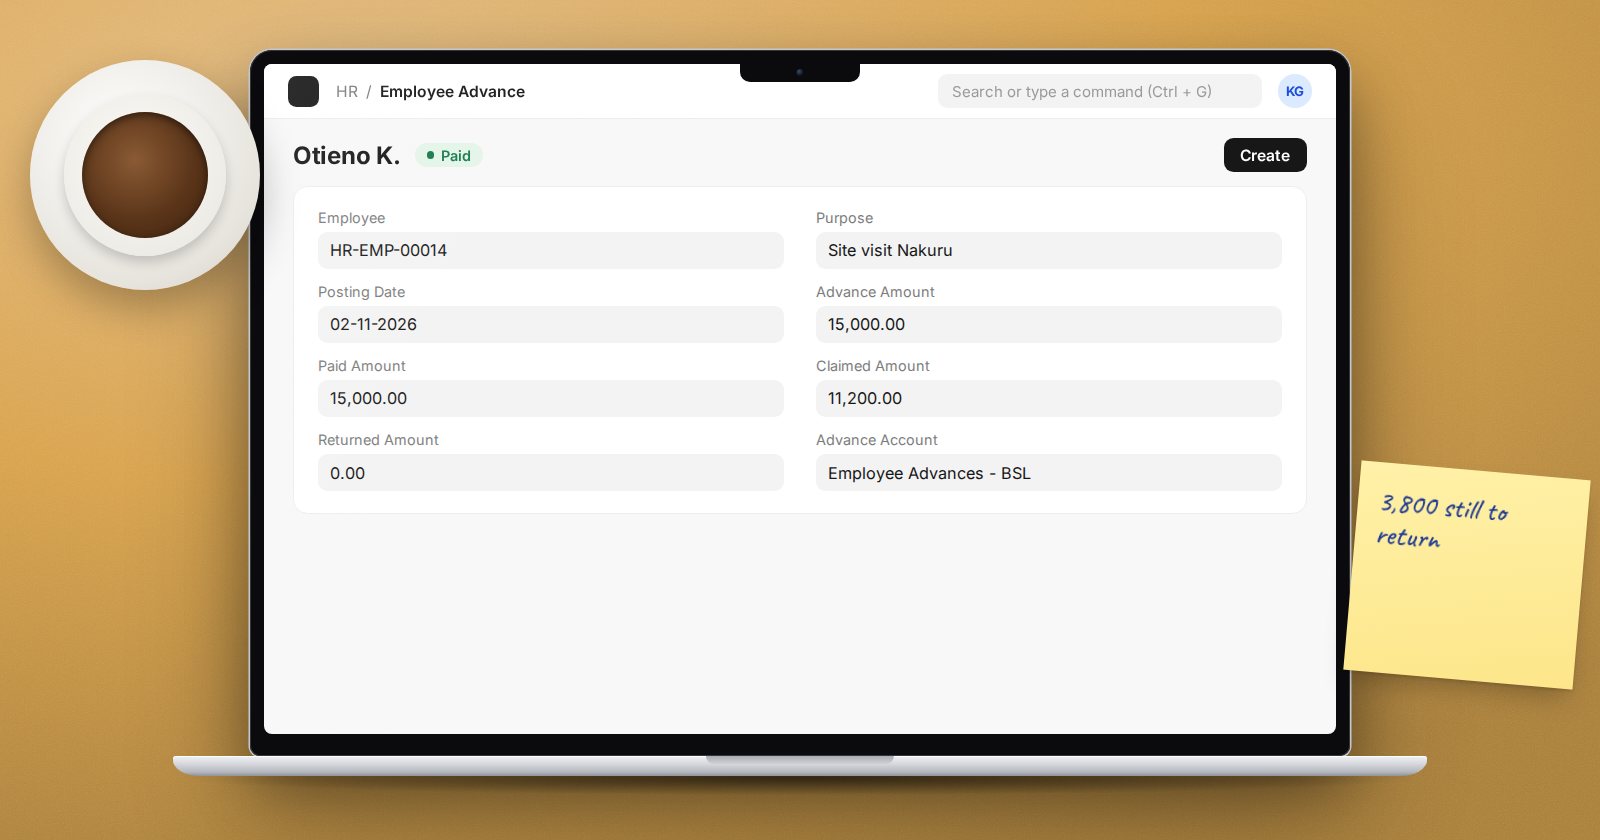
Before a field trip, a site visit or a purchase that cannot wait for an invoice, staff often need cash in hand. If that money is recorded as an expense on day one, the books are wrong until receipts come back, and nobody can see who still owes what. ERPNext treats it as an Employee Advance: money the employee owes the company until it is accounted for.
Setup: the advance account
An advance is an asset, not an expense, so it needs its own account. ERPNext requires the Advance Account on an Employee Advance to be of account type Receivable. Set it in one of two places:
- Default Employee Advance Account on the Company (HR & Payroll tab), used for everyone; or
- Employee Advance Account on the Employee (Salary tab), when a person's advances should sit in a different account.
The form fetches the employee's account first and falls back to the company default.
Step 1: request and approve
Create an Employee Advance with the Employee, Purpose, Advance Amount and Posting Date. Submit it once approved. If the advance should be recovered from salary if not spent, tick Repay Unclaimed Amount from Salary now; it changes the options you get later.
Step 2: pay it
From the submitted advance, use Create > Payment. This raises a Payment Entry that credits bank or cash and debits the advance account against the employee. The advance status moves to Paid when the full amount has gone out. Partial payments show as Partially Paid.
Step 3: settle it
When the employee comes back, there are three ways to close the balance, often in combination.
Against an expense claim
Use Create > Expense Claim from the advance, or create a claim and pull the advance into its Advances table. Set the Allocated Amount to what the receipts cover. The claim then settles against the advance instead of creating a fresh amount owed to the employee. The advance's Claimed Amount rises.
Return of unspent cash
If money is handed back, use Create > Return. This creates a Journal Entry crediting the advance account and debiting cash or bank. The Returned Amount updates.
Deduction from salary
If Repay Unclaimed Amount from Salary was ticked, the Return option is replaced by Create > Deduction from Salary. This creates an Additional Salary deduction for the next payroll, so the balance is recovered through the payslip. Make sure the deduction component exists and that the employee has been told in writing, in line with your HR policy.
Status values
An advance moves through Draft, Unpaid, Paid or Partially Paid, then Claimed, Returned or Partly Claimed and Returned. Anything still Paid after the trip is over deserves a phone call.
Keep the balance honest
- Run the Employee Advance Summary report monthly. It lists advances with paid, claimed and pending amounts by employee.
- Do not issue a new advance to someone with an old one still pending, unless policy allows it.
- Never "clear" an advance by posting a journal straight to expense. Use a claim, so the receipts and approvals are on record.
Try it
Issue a test advance, pay it, then settle part with an expense claim and return the rest. Open the advance at the end: Claimed Amount plus Returned Amount should equal the Paid Amount, and the status should no longer be Paid.
Advances, expense claims and salary deductions meet in the middle of HR and payroll; the Payroll course shows how the deduction flows through the payslip.